Enable push notifications in Firebase
Create Key to enable Push Notification in firebase
If your application has Push Notification delivery, you must follow the steps below to enable it in your Firebase account:
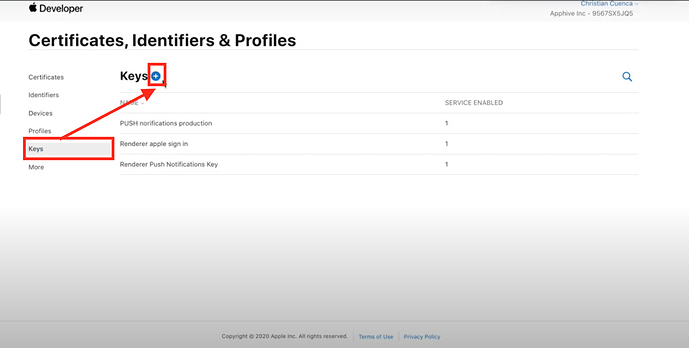
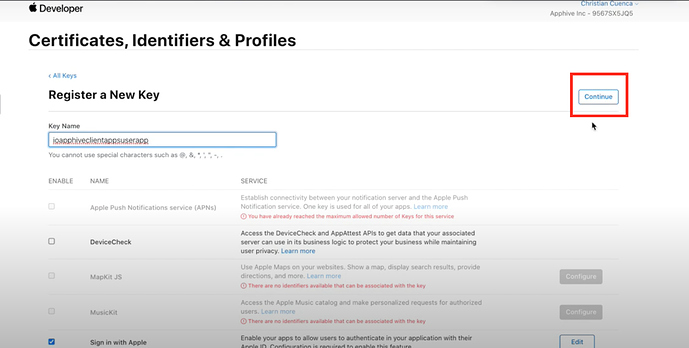
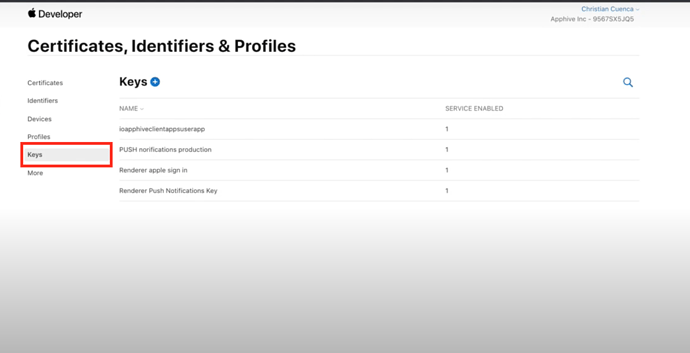
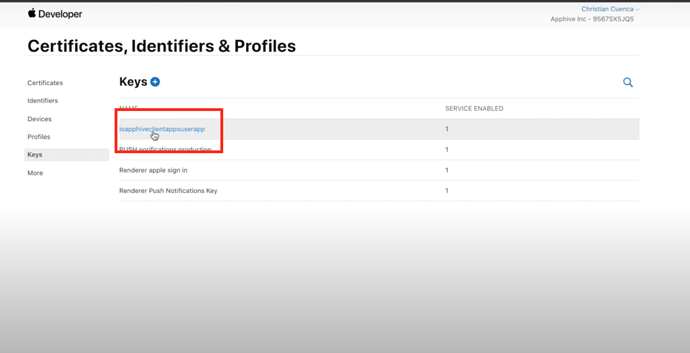
1.Enter Certificates, Identifiers and Profiles 93 Select Keys and click the Add icon.
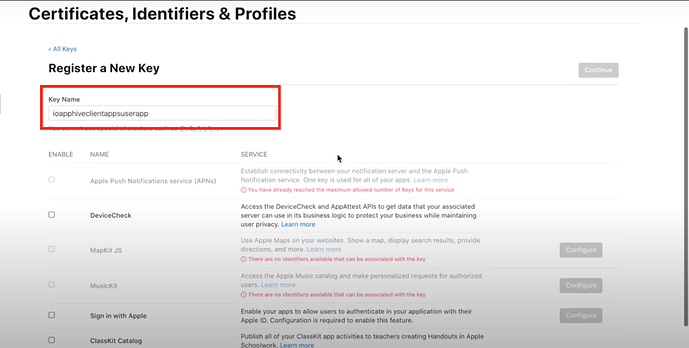
2.Add the COMPILATION ID of your app but remove the period signs. Example: ioapphiveclientappsuserapp
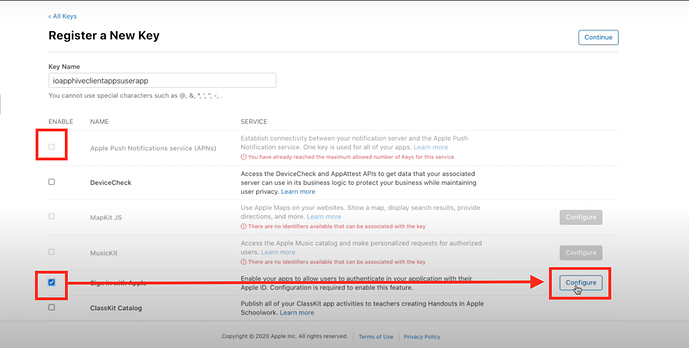
3.Select Apple Push Notification (Only if one of your apps has the Push Notification feature) Select Sign in with Apple (Only if one of your apps has Gmail or Facebook login) and click configure.
VERY IMPORTANT If none of your apps have any of these features You can continue with the creation of the App container in App Store Connect
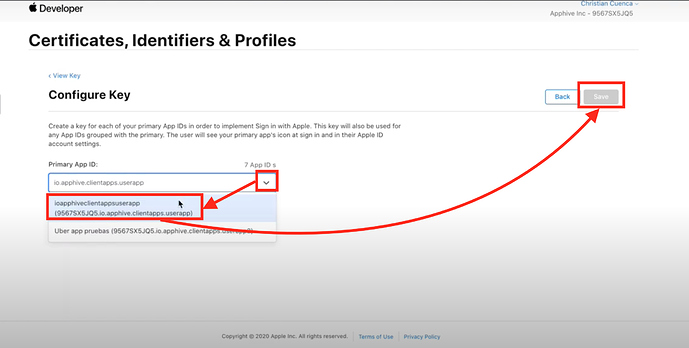
4.Click the select button, select the COMPILATION ID of your app and click Save.
5.Click on Continue
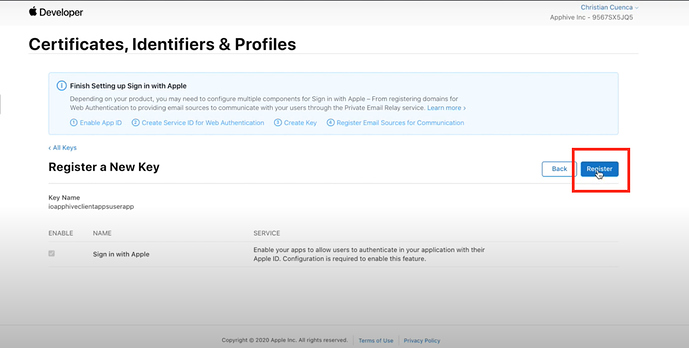
6.Click on Register.
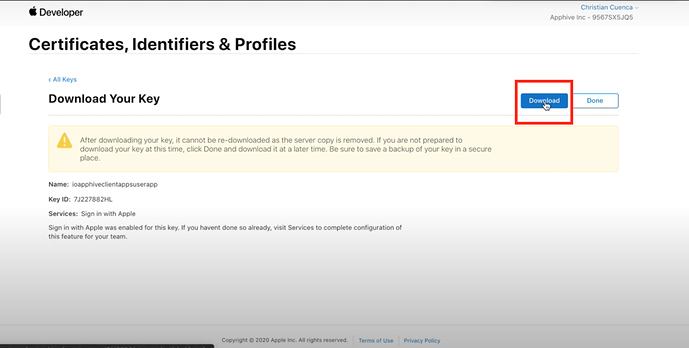
7.Click Download to download the .P8 file.
VERY IMPORTANT create a folder on your computer named KEY and save this file in that folder VERY IMPORTANT YOU ONLY NEED ONE .P8 FILE FOR ALL THE APPS IN THE PROJECT
ADD PUSH NOTIFICATION PERMISSIONS IN FIREBASE
In case your application uses push notifications you must follow the following steps:
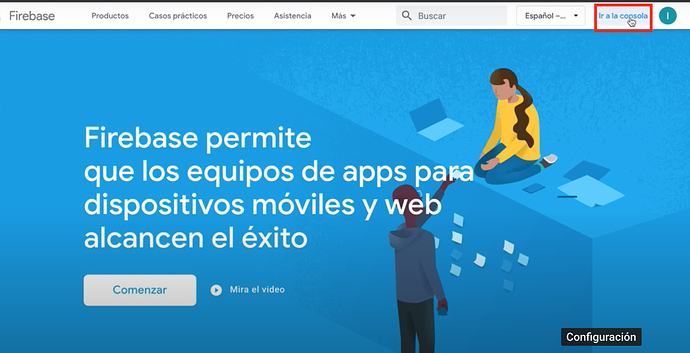
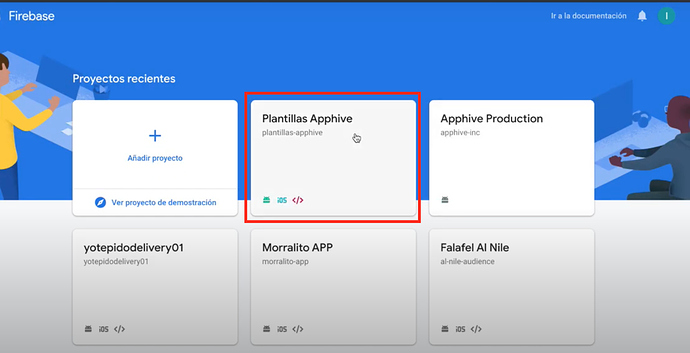
1.Go into your Firebase, you can do it from here and click Go to console.
2.Select your project.
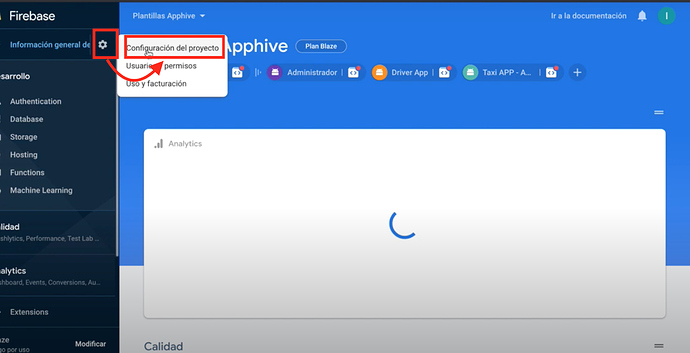
3.Click on settings and click on project settings.
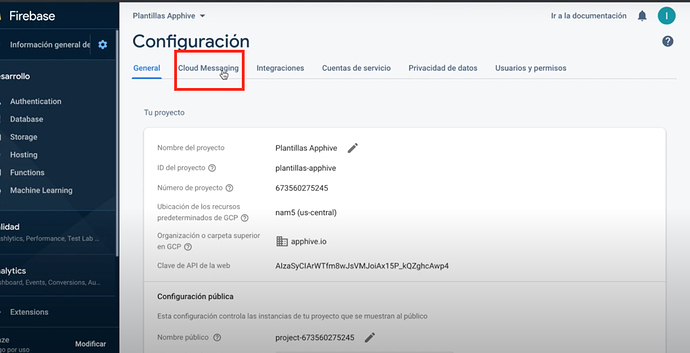
4.Click on Cloud messaging.
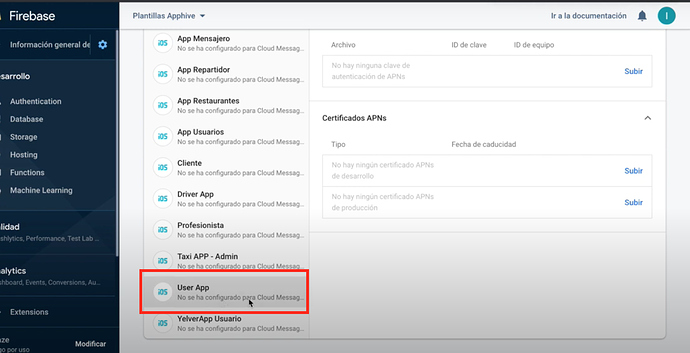
5.Select the app that has the IOS symbol and has Facebook login or push notification..
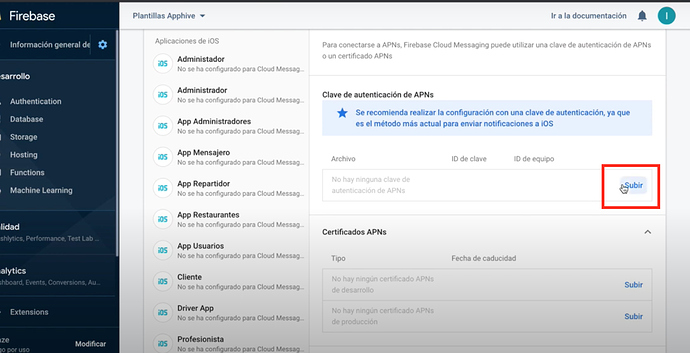
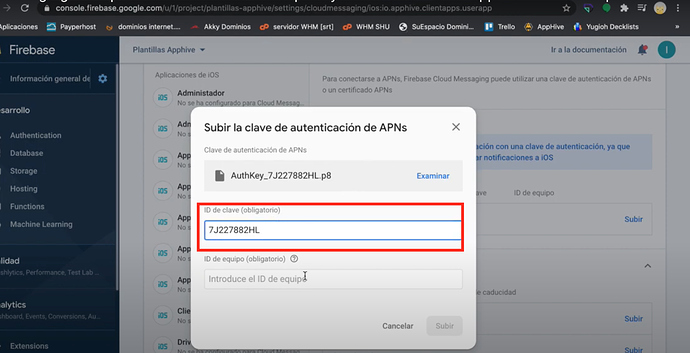
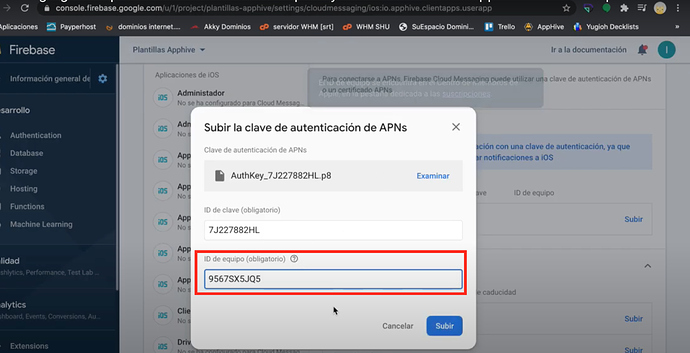
6.Click upload.
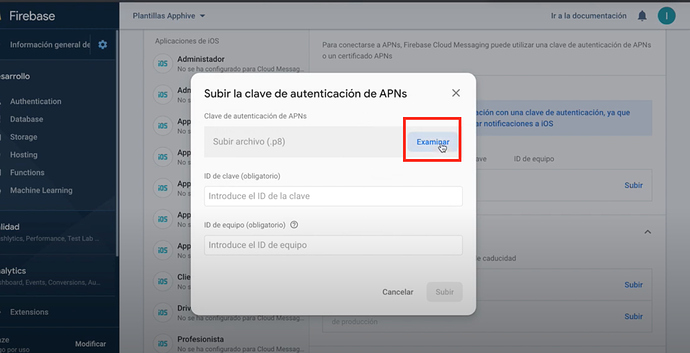
7.Click on examine.
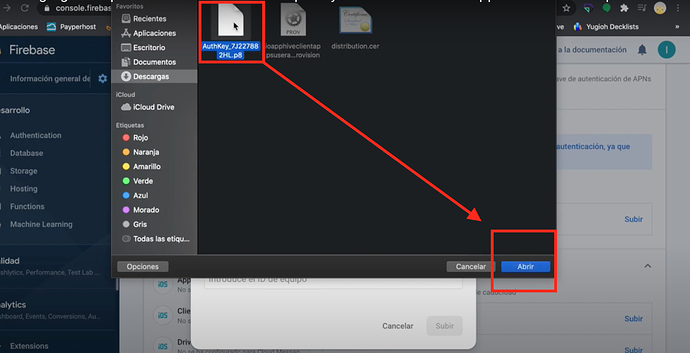
8.Select the .P8 file from the KEY folder and click Open.
9.Select Key in your certificates, identifiers and profiles section Here
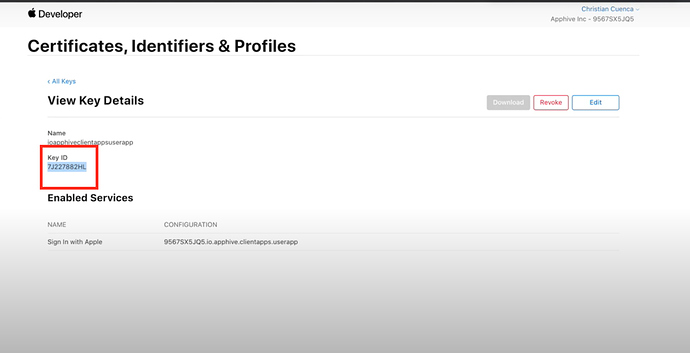
10.Select the COMPILATION ID of your app.
11.Copy the Key ID and paste in the Key ID box (required)
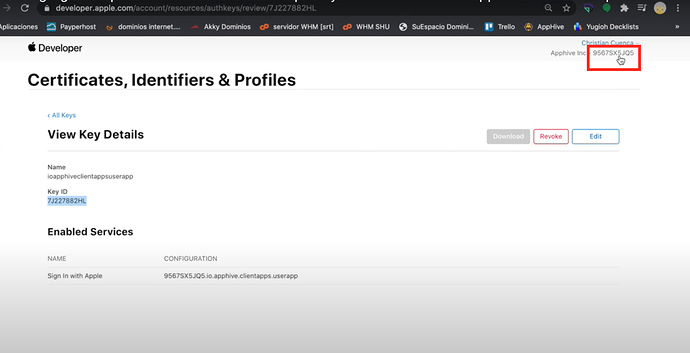
12.Copy the Team ID and paste into the Team ID box.
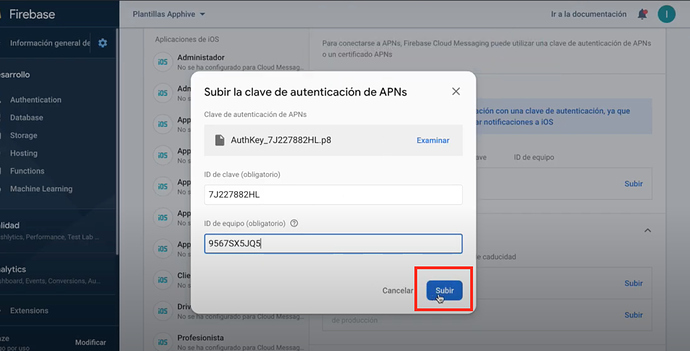
13.Click Upload.
With this, the notifications will be working correctly in your application.
Last updated
Was this helpful?
