# Request Apk and Abb in Apphive
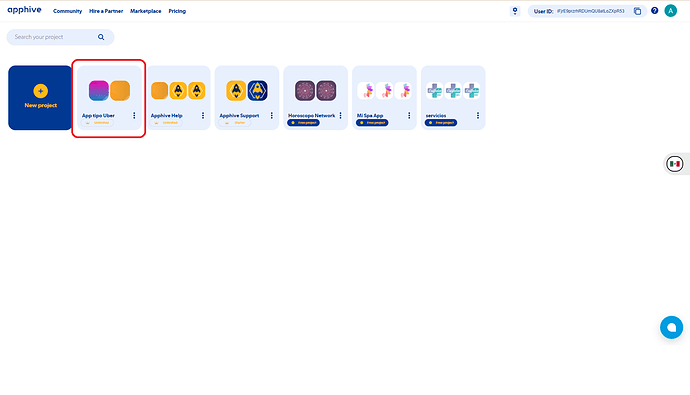
1.- Enter [https://editor.apphive.io ](https://editor.apphive.io/)and select your project
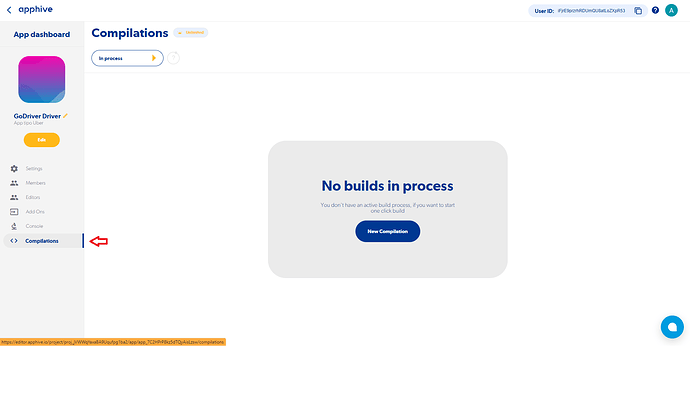
2.- Click on the Options icon and click on App dashboard
3.- Click on Compilations
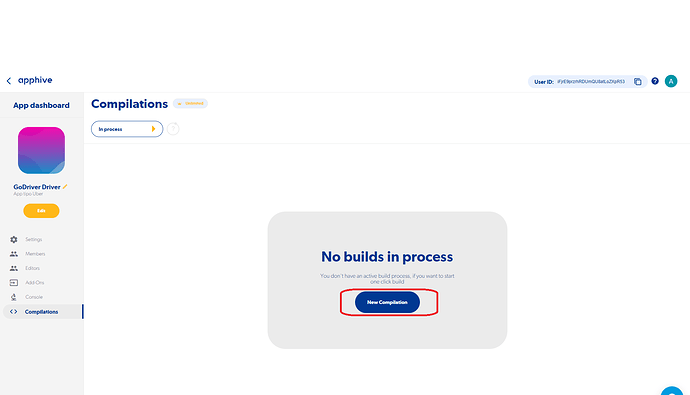
4.- Click on the New Compilation button
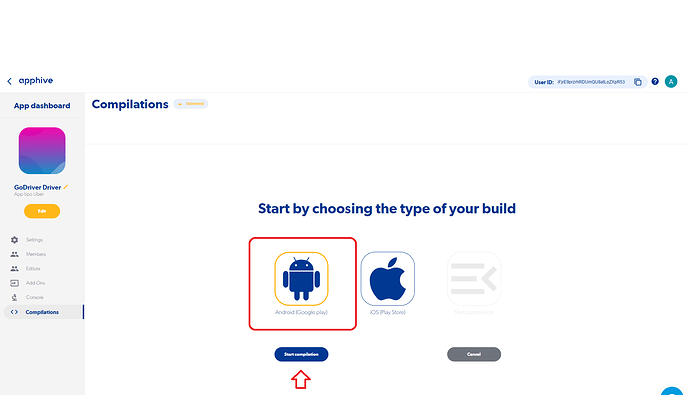
5.- Select Android (Google Play) and click on Create request
6.- Add a compilation ID without typing Space, using the structure that is shown in\
the following picture, always separating between each one with a dot and with no\
spaces. **YOU DON’T NEED TO HAVE A WEB DOMAIN, DON’T WRITE**\
**LOWERCASE LETTERS, ACCENTS, NUMBERS, OR PUNCTUATION SYMBOLS,**\
**EXCEPT DOTS.**
Domain type: com, gov, edu, net, org, io, mx, etc.\
Name of your Firebase project: ubereatsplantillas\
Copy and paste, from the note or document, the NAME OF YOUR FIREBASE\
PROJECT and erase the spaces between each word, if any.\
Name of your app (the name your app is identified): plantillausuario,\
ubereatsusuario, appubereats.\
**IMPORTANT** Copy the Compilation ID of your app and then paste it in your notes or\
a document as below:\
COMPILATION ID: com.ubereatsplantillas.plantillausuario\
After that, click on Assign Compilation ID
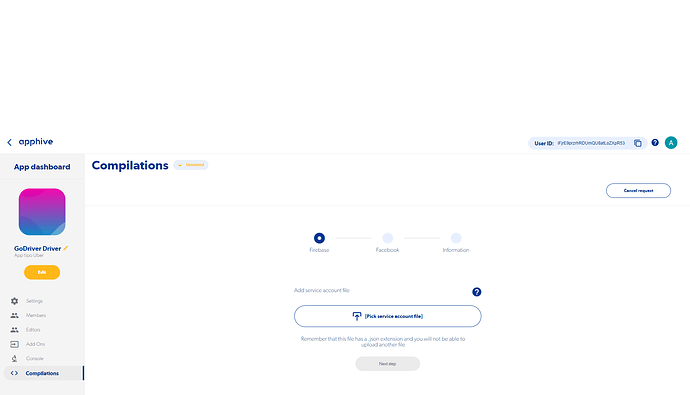
7.- Click on Pick Service Account file.
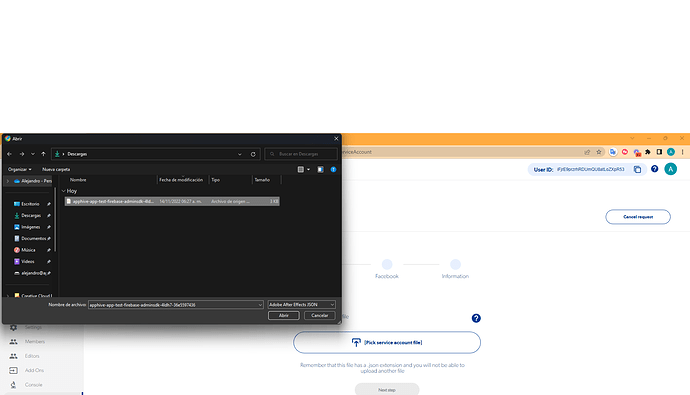
8.- Open the SERVICE ACCOUNT FILE folder, choose the .json file, and press Open
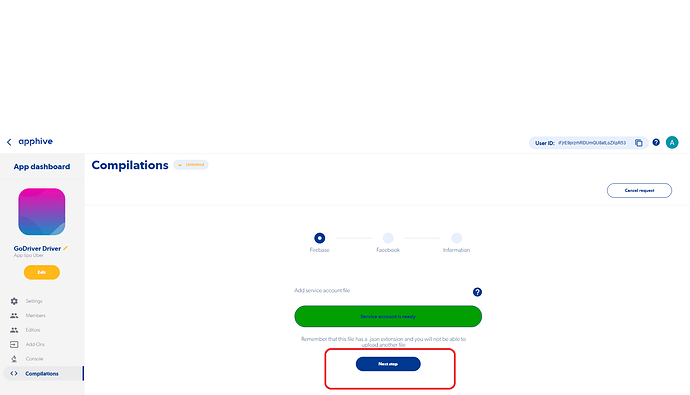
9.- Verify that the button changes to File Uploaded Successfully, and click on Next\
Step
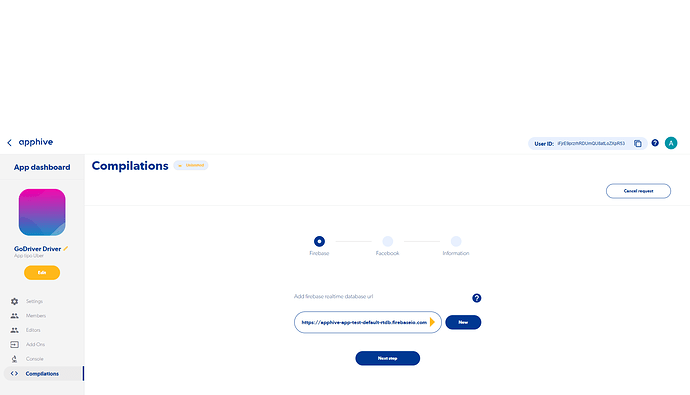
10.- Copy from your notes or documents the FIREBASE REAL-TIME DATABASE\
URL, paste it on the box and click on Next Step.
11.- Copy from your notes or documents the FIREBASE STORAGE URL, paste it on\
the box and click on Next Step.
14.- Verify that you have enabled, in the “Authentication/sign-in method” section, Log\
in with your Firebase email, and click on Reload.
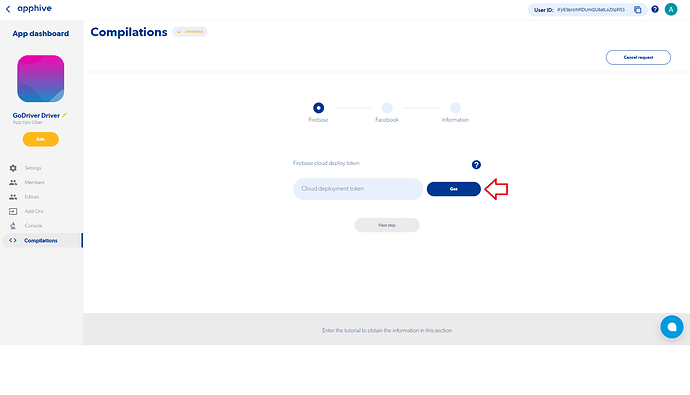
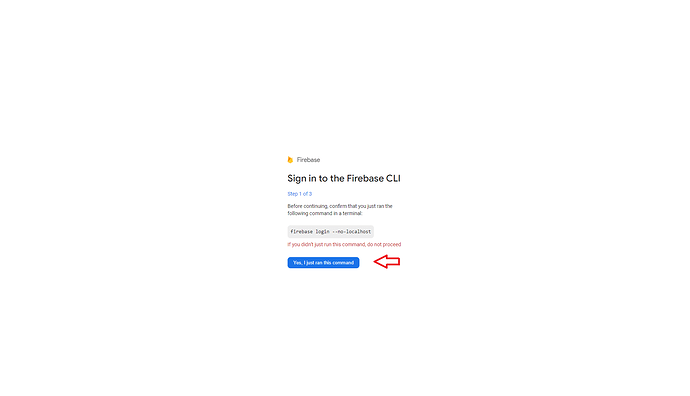
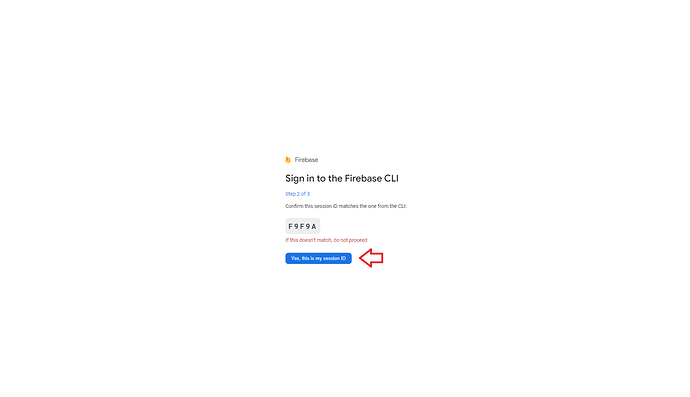
15.- Click on “Click here to get deployment token”.
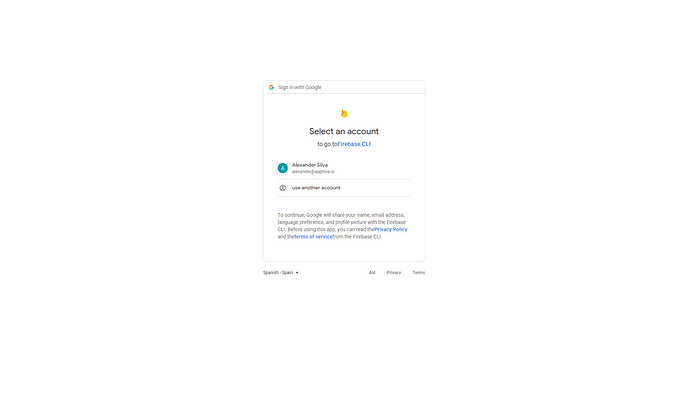
16.- Choose your Gmail account
* Important: You must log in with the same account you used to create your\
Firebase project
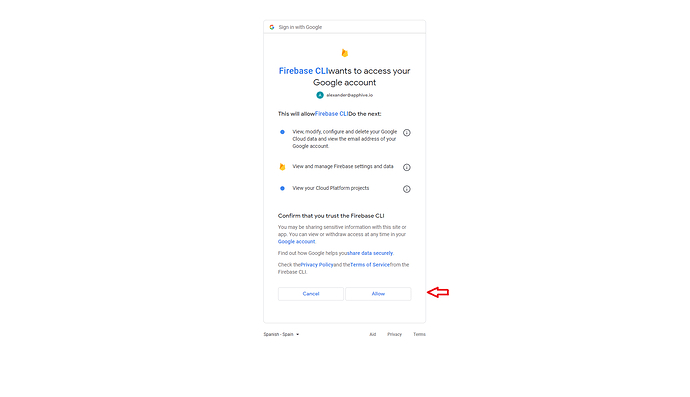
17.- Click on Allow
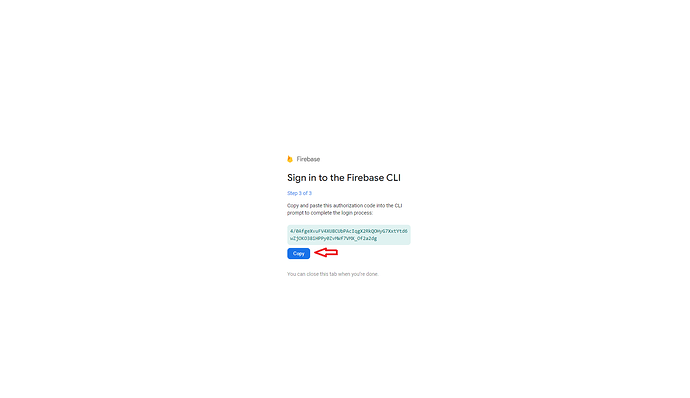
18.- Click on the Copy icon
\
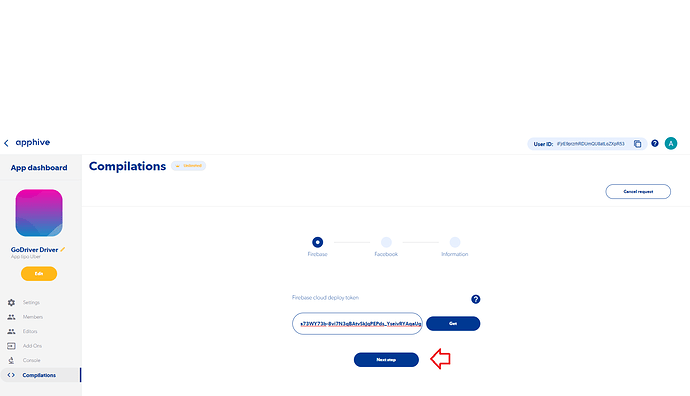
19.- Paste it on the Cloud Deployment Token box, and click on Set Token
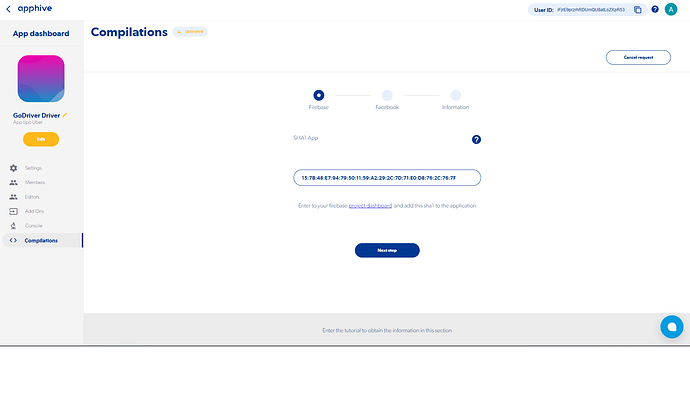
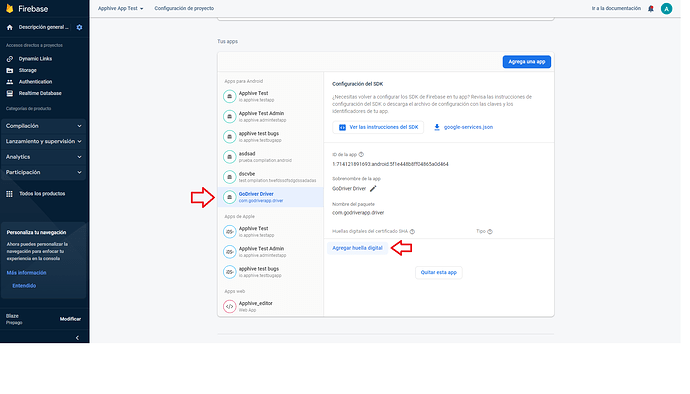
20.- Copy the SHA-1 from the box, click on Project Dashboard
21.- Click on Add a fingerprint
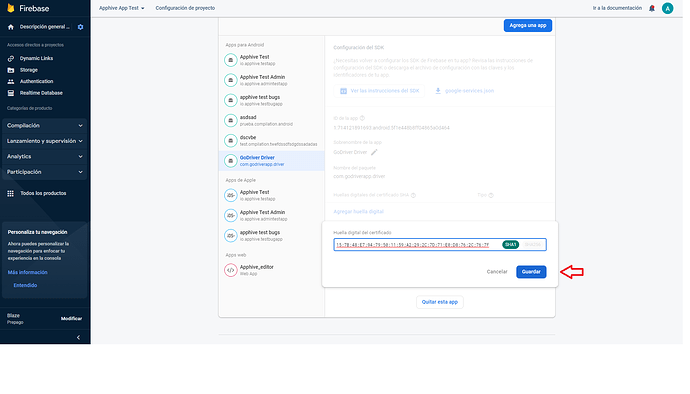
22.- Paste the SHA-1 in Certificate Fingerprint, click on Save.
23.- Go back and click on Next Step
**VERY IMPORTANT: THE FOLLOWING TEMPLATES CAN DISPLAY DEPENDING**\
**ON THE FUNCTION YOU ADDED IN YOUR APP (LOGIN WITH WITH**\
**FACEBOOK, LOGIN WITH GMAIL, START GEOLOCATION TRACKING, MAP**\
**ELEMENT), AND YOU MUST COMPLETE THEM TO FINISH THE PROCESS OF**\
**APK AND AAB REQUEST, THESE REQUIREMENTS WON’T DISAPPEAR, EVEN**\
**IF YOU DELETE THE FUNCTION IN THE APP**
**SIGN IN GOOGLE METHOD**
1.- Click on Project Dashboard. Within your Firebase, check if you have enabled the\
Log In with Gmail function.
2.- Select “Google”, click on Activate, select your email and click on Save.
3.- Go back and click on Next Step
**SIGN IN FACEBOOK METHOD**
1.- Click on project dashboard, in your Firebase verify that you have enabled the login with Facebook
2.- Click on Next step
3.- Copy the FACEBOOK APP ID from your note or word and paste it into your box, then copy the FACEBOOK SECRET KEY from your note or word and paste it into your box
4.- Click on Next step
5.- Click on Facebook app dashboard
6.- Click on Configure in Login with Facebook.
7.- Click on Android.
8.- Click on next step
9.- Click on Facebook app dashboard
10.- Click on the Android icon.
11.- Click on next.
12.- Click on next.
14.- Paste the Android package name in Package name, type MainActivity (with the exact same capitalization and no spaces) and click Save
15.- Click on continue.
17.- Paste the Release key hash in Key Hashes, select the key hash in blue and click save
19.- Click to activate the Single Sign On switch, click Save and Next.
**GOOGLE MAPS KEY**
1.- Paste your Google API Key in the marked box, then click on Next Step
* \*In case you need to get your Google API Key
---
# Agent Instructions: Querying This Documentation
If you need additional information that is not directly available in this page, you can query the documentation dynamically by asking a question.
Perform an HTTP GET request on the current page URL with the `ask` query parameter:
```
GET https://docs.apphive.io/global-functions-1/android/estilos/margins.md?ask=
```
The question should be specific, self-contained, and written in natural language.
The response will contain a direct answer to the question and relevant excerpts and sources from the documentation.
Use this mechanism when the answer is not explicitly present in the current page, you need clarification or additional context, or you want to retrieve related documentation sections.