Publish your app in Play Store
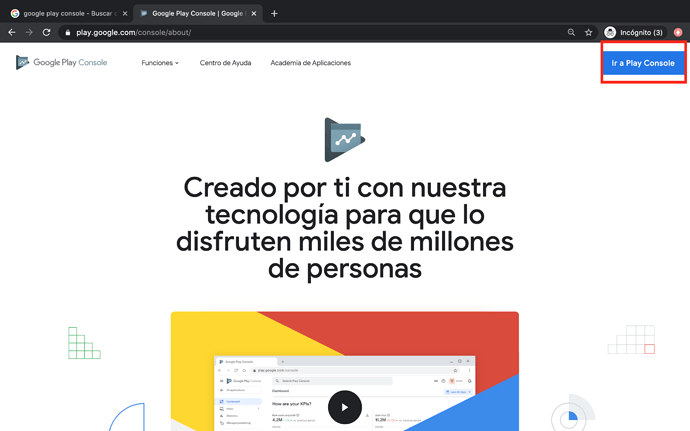
1.- Enter Google Play Console | Google Play Console and click on Go to Play Store
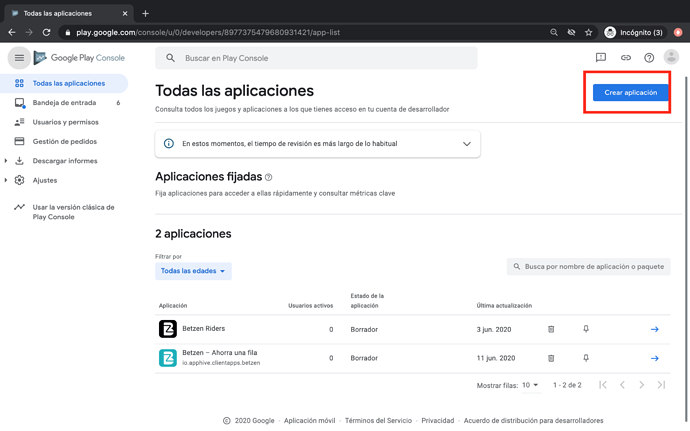
2.- Click on Create App
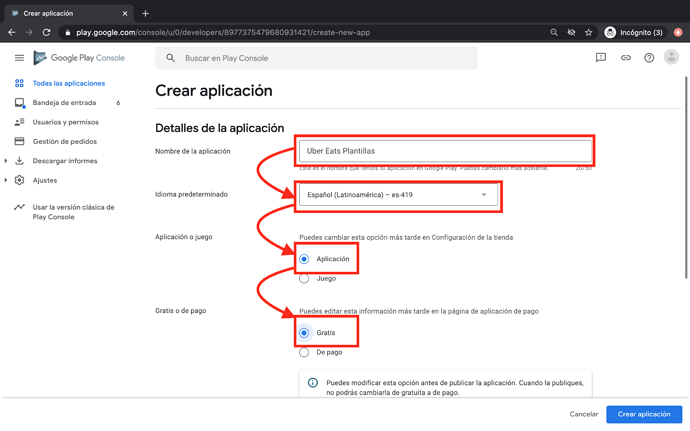
3.- Type the name of your app, select the language, click on the App box, then click on the Free (or Premium) box, and finally click on Create App
Select the Free box when your app does not have a price for downloading it; select the Premium box when your app has a price for downloading it
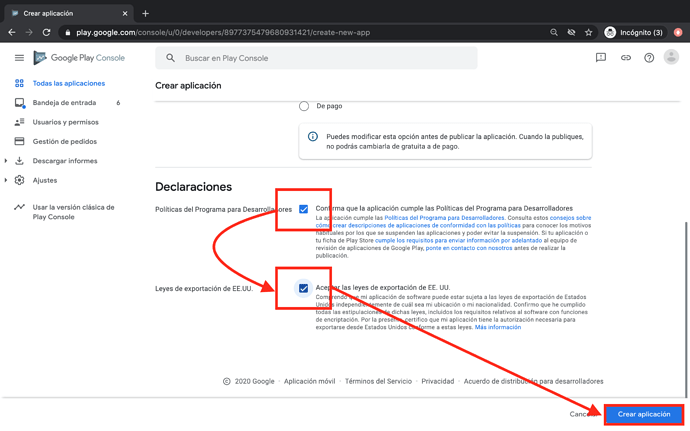
4.- Accept the Program for Developers Policy, the U.S Laws of Exportation, and then click on the Create App
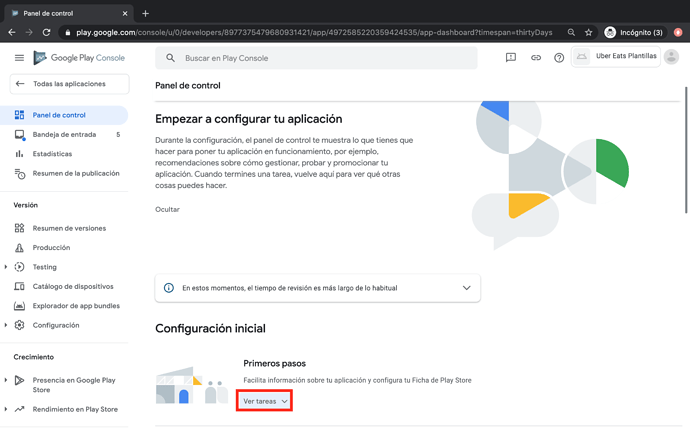
5.- Click on See Tasks
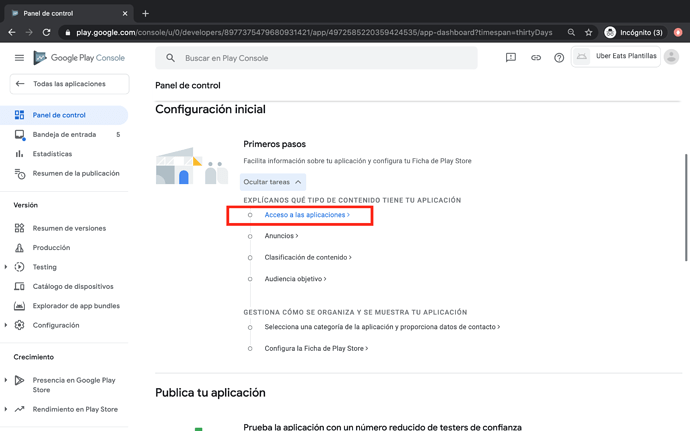
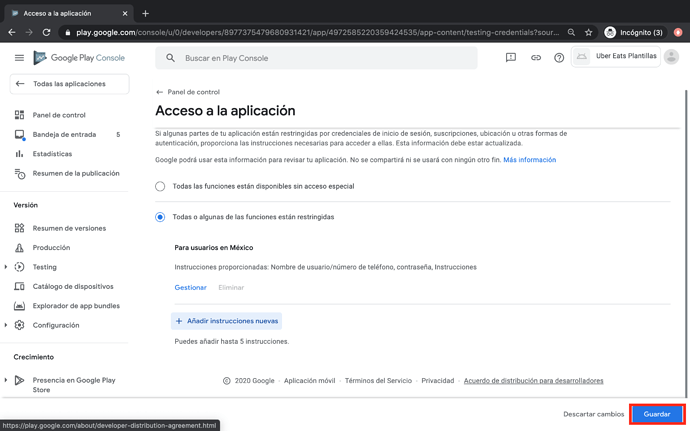
6.- Select the Access to Apps
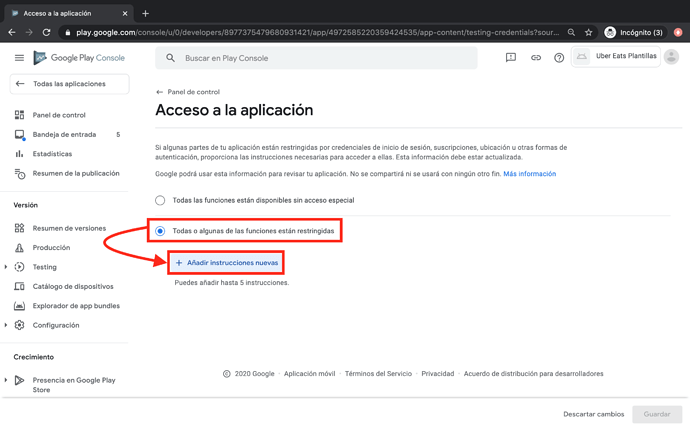
7.- Click on All or some of the functions are restricted, in case your app contains a Log In or Sign Up function
*In case your app does not contain Log In or Sign Up, you can select “All functions are available without special access”
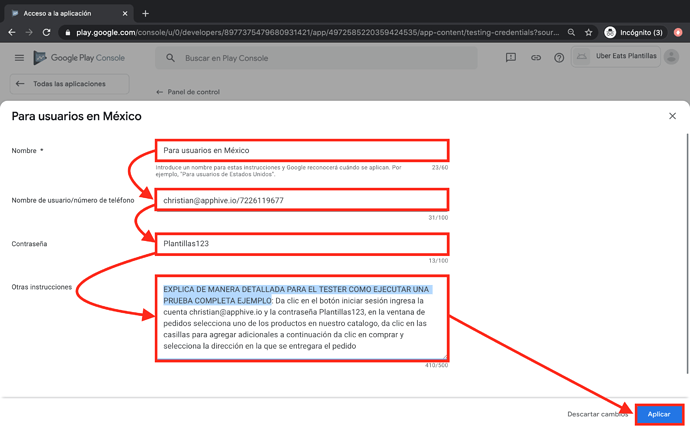
8.- Write a name for the instructions in Name, write a user’s email and password
IMPORTANT: You must create a user within your app with this account and password as the testers won’t create an account in your app. And last, you must explain in detail how to explore completely for the person who will test your app in Other Instructions, and click on Save EXAMPLE: 1.- Click on the Login button, enter the account [email protected] and the password Templates123 2.- In the order tab, select one of the products in our catalog 3.- Click on the boxes to add additional 4.- Then, click on Buy 5.- Select the address where the order will be delivered.
9.- Click Save.
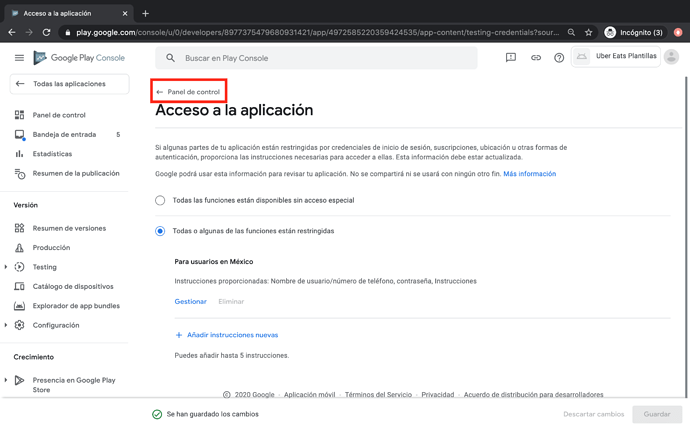
10.- Go back using the control panel option.
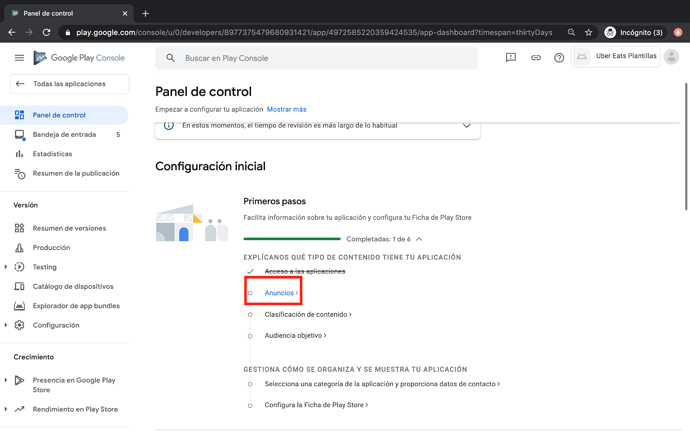
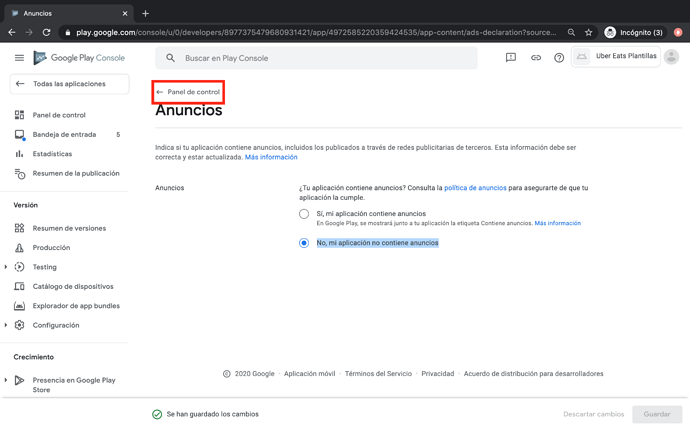
11.- Select Ads.
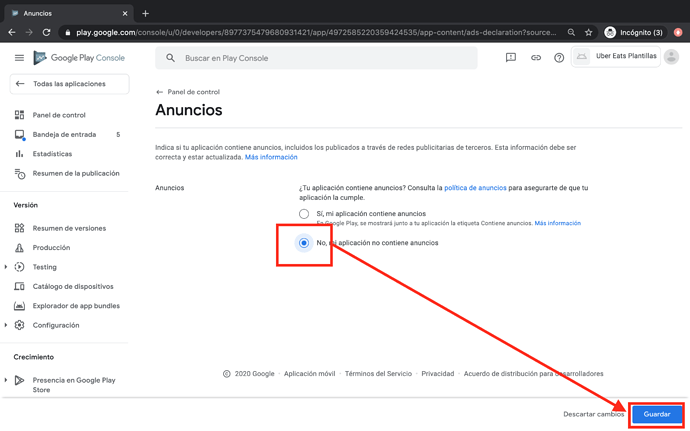
12.- Select No, my application does not contain ads and click Save
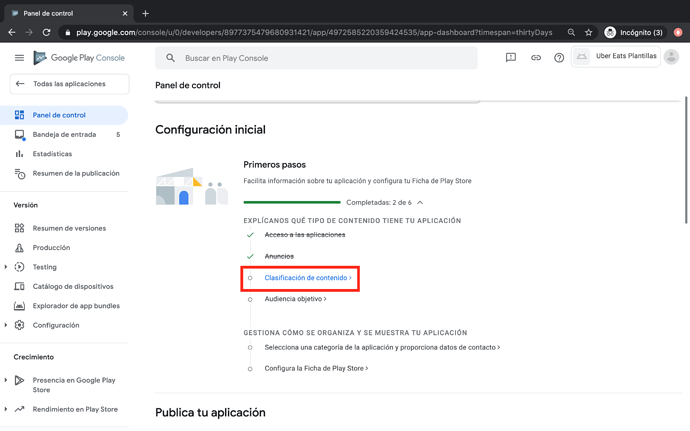
13.- Click on Control Panel
14.- Select Content Classification
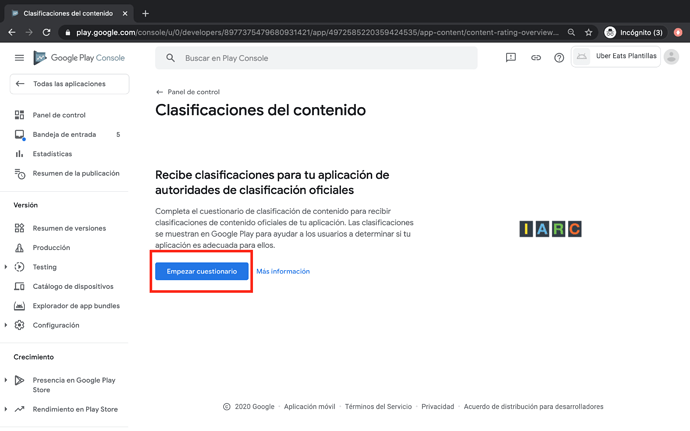
15.- Click on the Start Questionnaire button
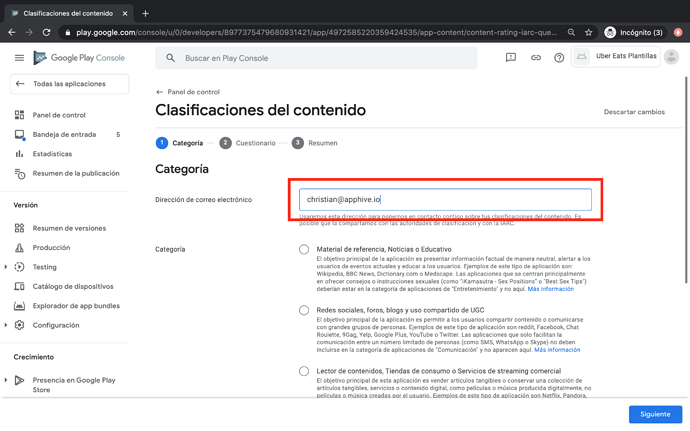
16.- Enter your email address
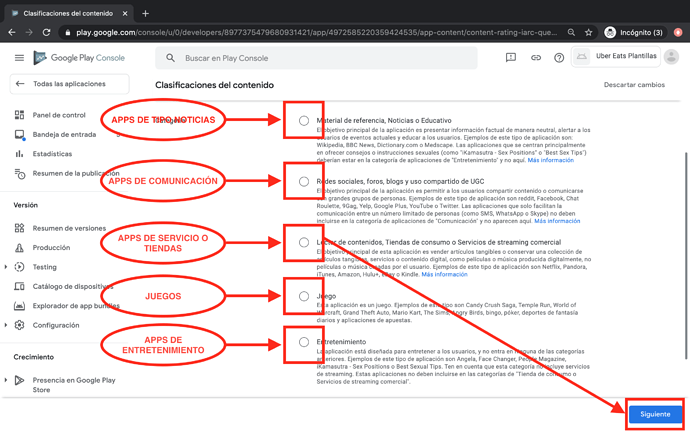
17.- Select a category depending on the content in your app and click Next
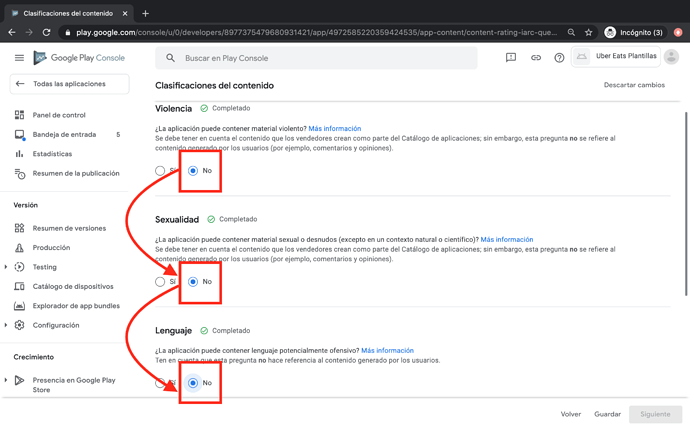
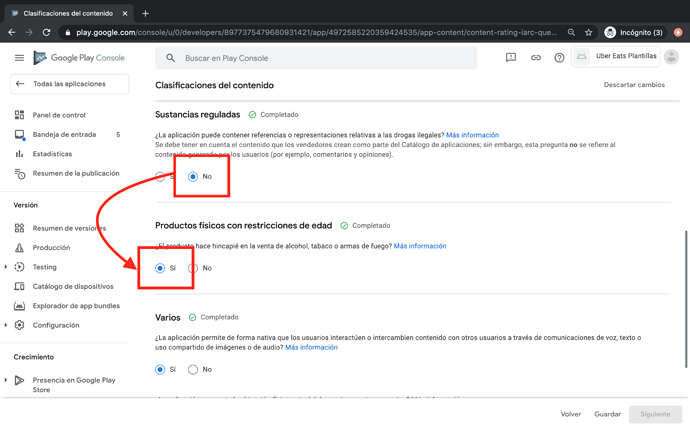
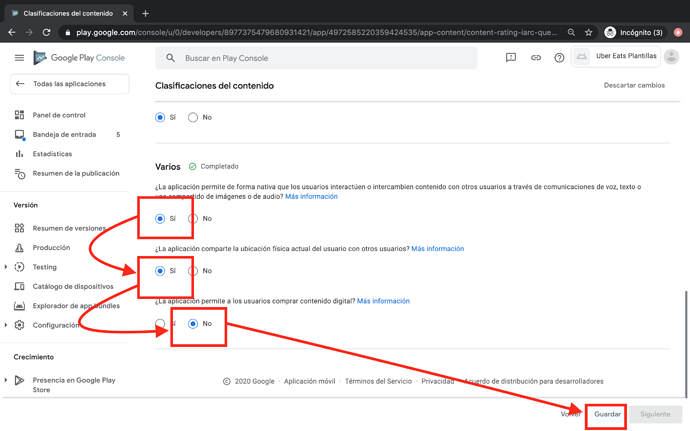
18.- Check the following boxes depending on the content in your app and click Save.
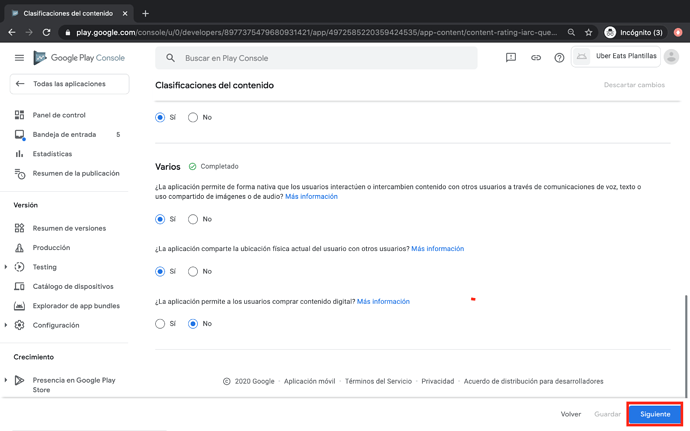
19.- Click on the Next button.
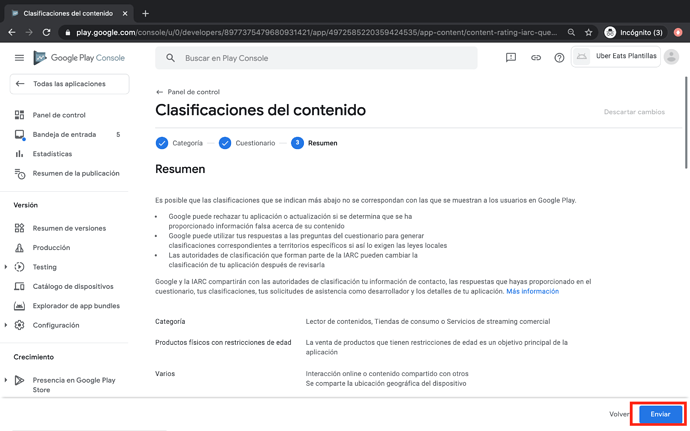
20.- Click Send.
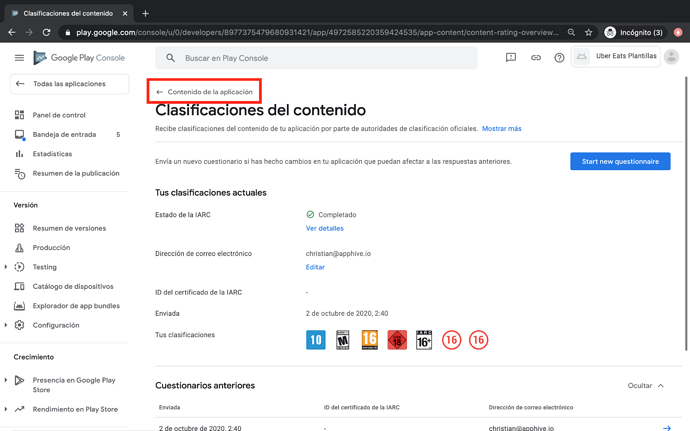
21.- Return to application content.
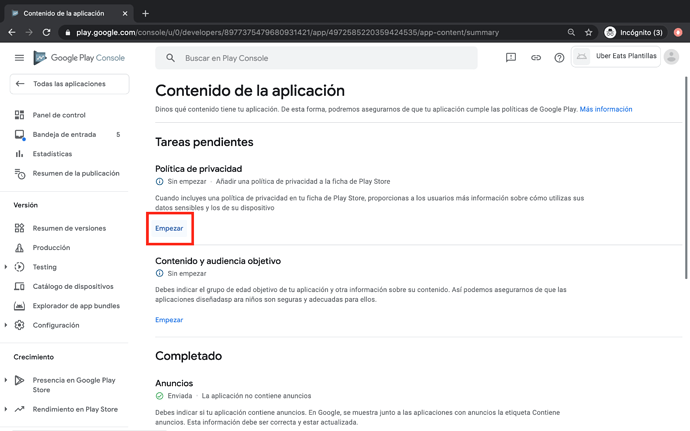
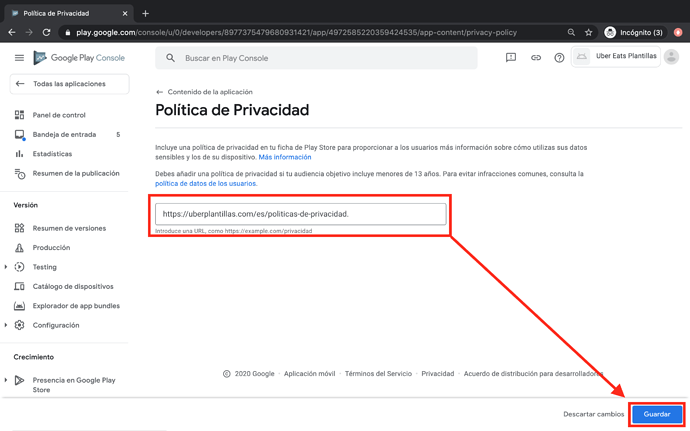
22.- Click Start in Privacy Policies.
23.- Add the URL of the privacy policies of your company or application, this will change depending on your country, so we recommend investigating directly how to obtain it in specialized pages of your country more info
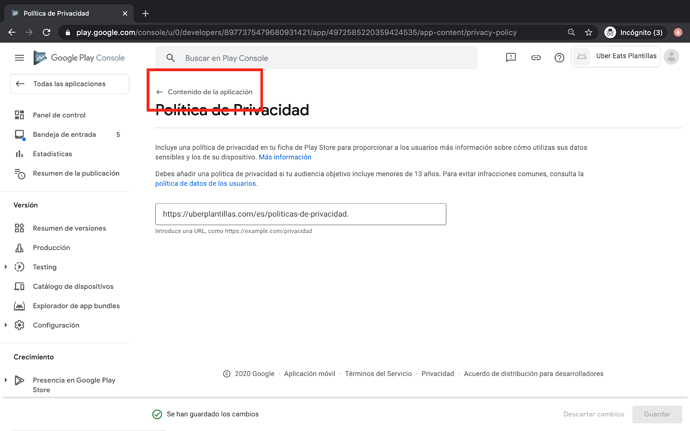
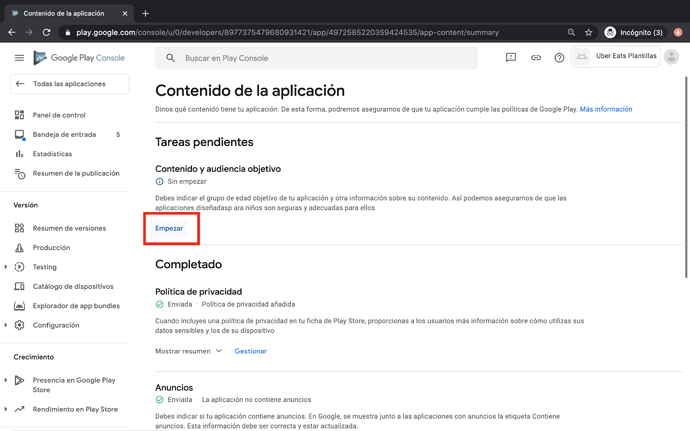
24.- Click on Save and select Content of the app
25.- Select start in Content and target audience.
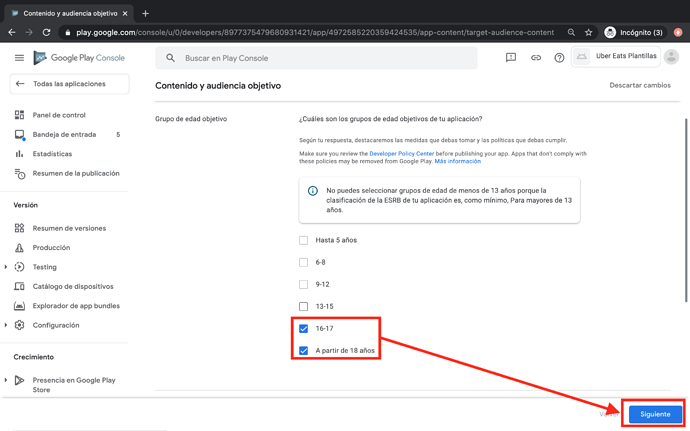
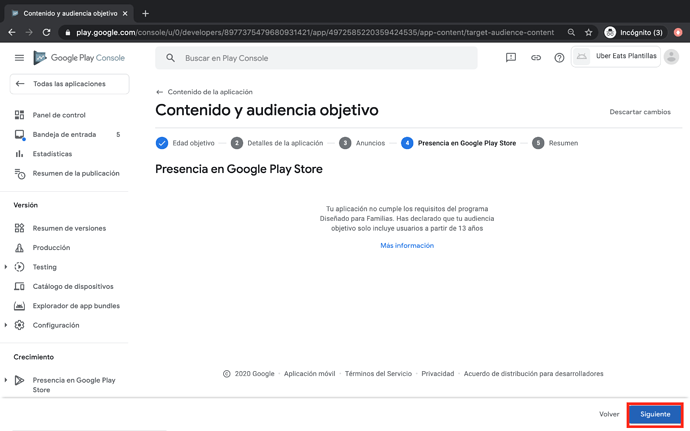
26.- Select the age of the public to whom your application is directed and click Next.
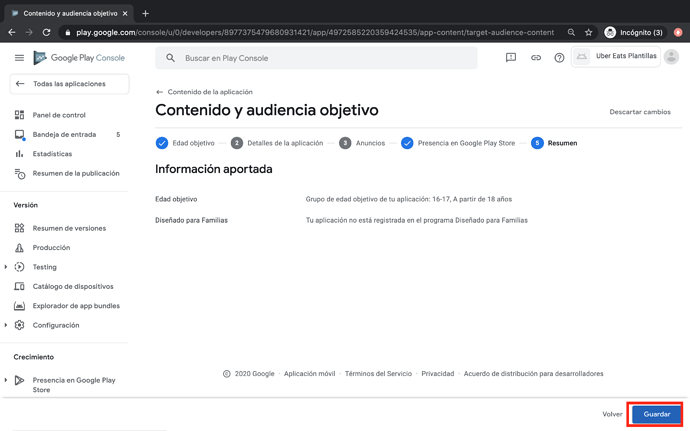
27.- Select Next.
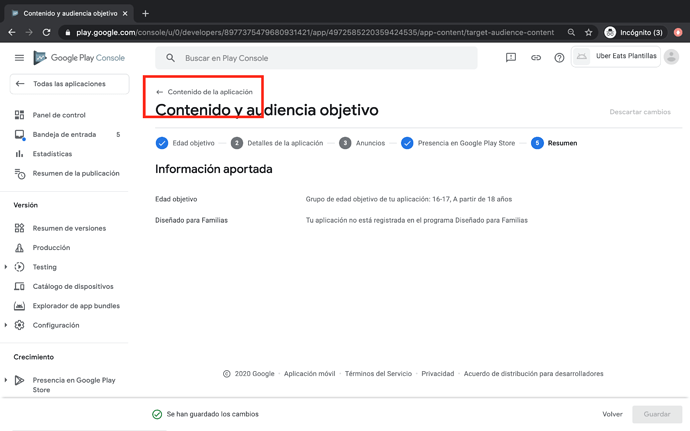
28.- Click on Save
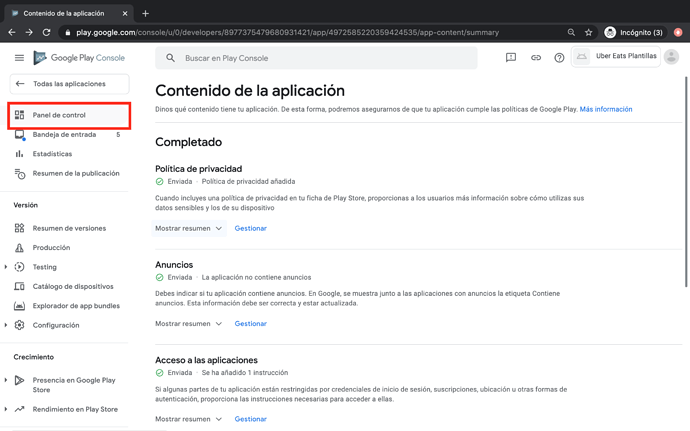
29.- Click on application content.
30.- Select Control Panel
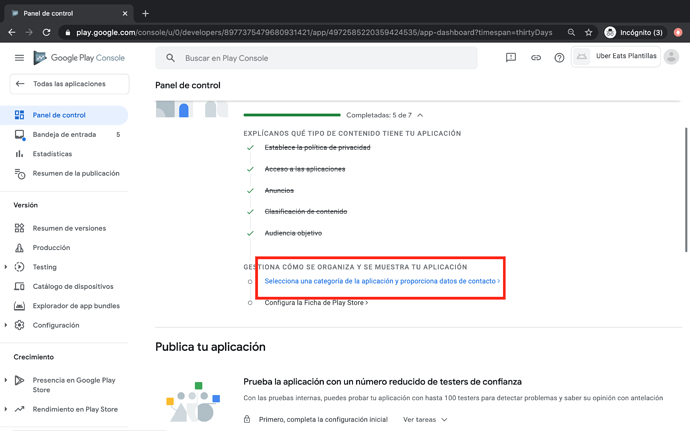
31.- Click on Select a category of the application and provide contact information.
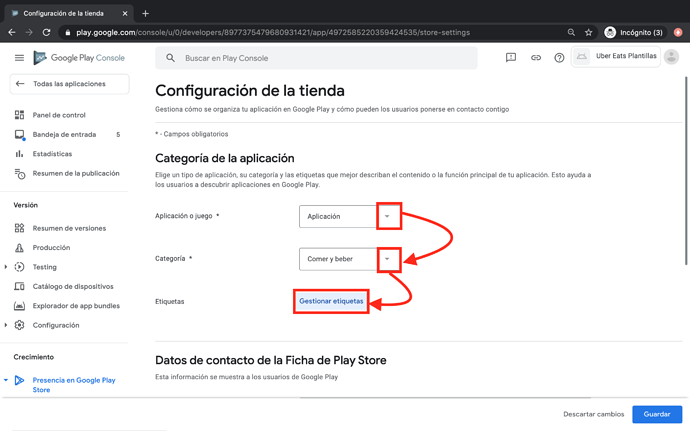
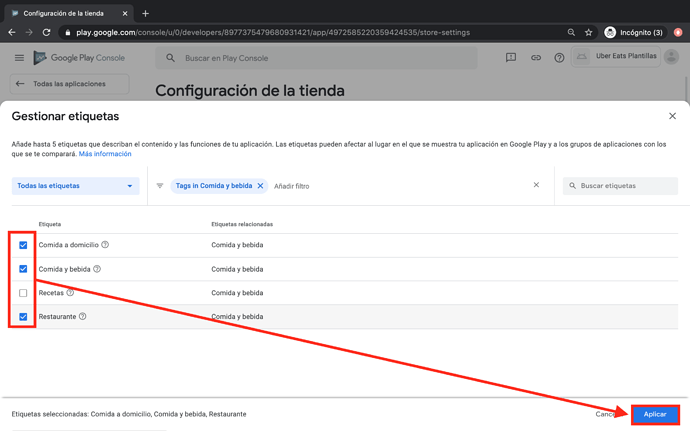
32.- Select Application, Select a category depending on the content of your application and click on Manage tags.
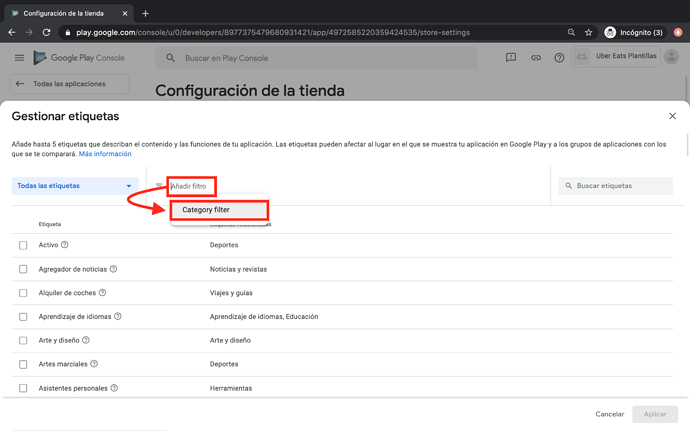
32.- Click on Add filter and select Category filter.
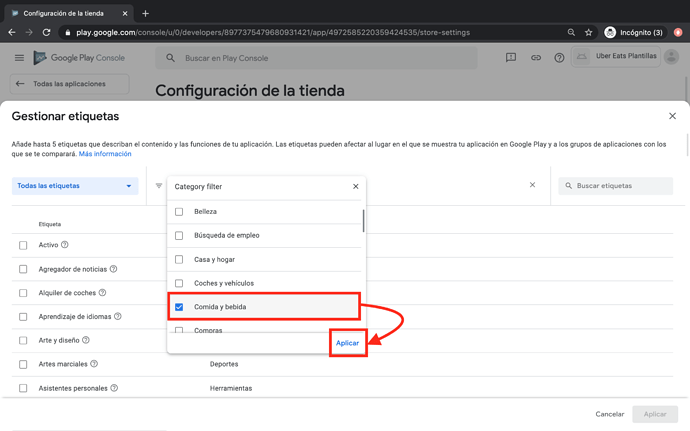
33.- Select the category of your application and click on apply.
34.- You can select up to 5 labels that describe the content of your application and click Apply.
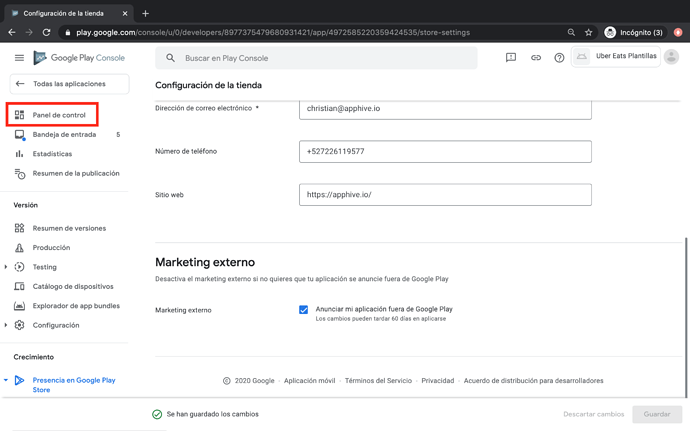
35.- Write YOUR email address, YOUR phone number * do not forget to add the code of your country, for example, Mexico: +52 ″, Add the URL of YOUR website, click on the external marketing box and click Save.
36.- Select Control Panel.
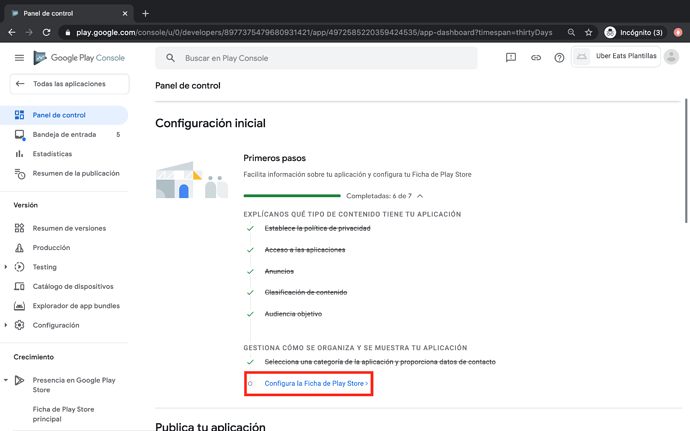
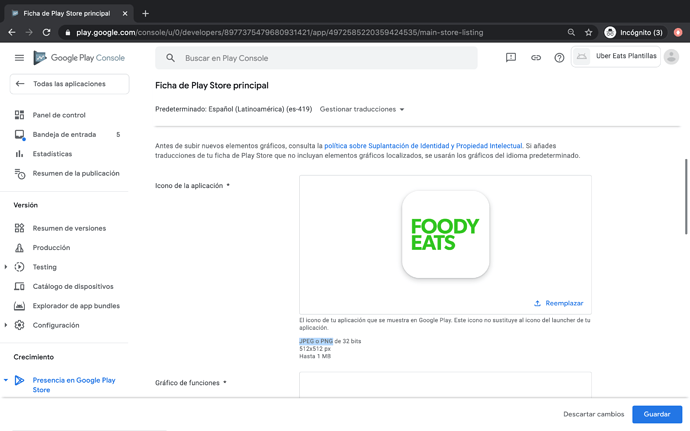
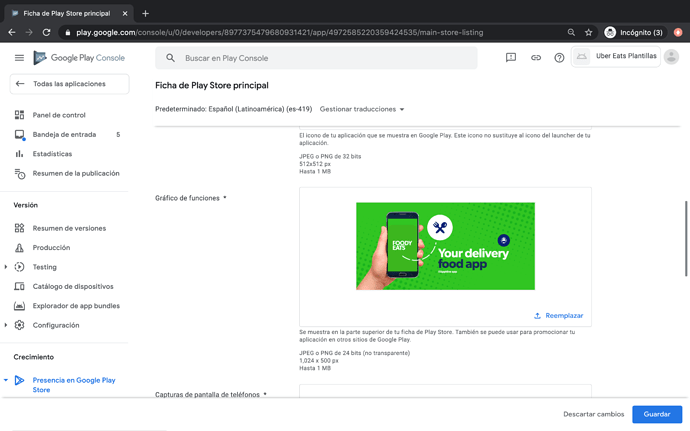
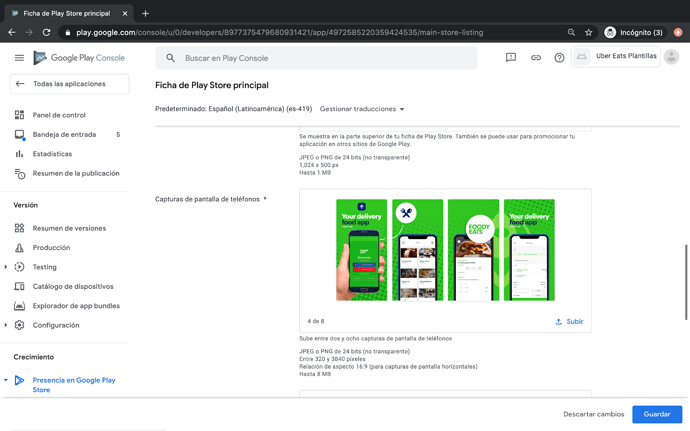
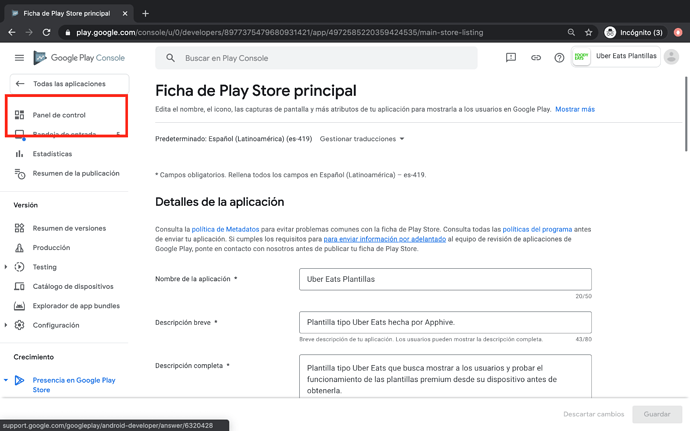
37.- Click on Configure the Play Store File.
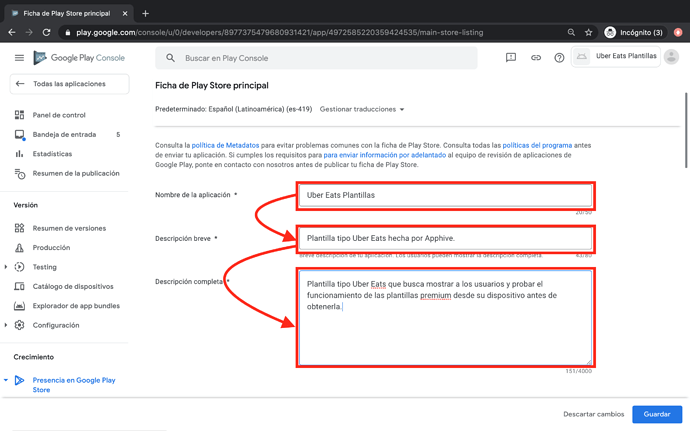
38.- Write the name of your application, a brief description of how it works, and a long description of how it works.
39.- Click on upload and load the icon of your app in a JPEG or PNG file of 512 x 512 pixels with a maximum weight of 1 MB
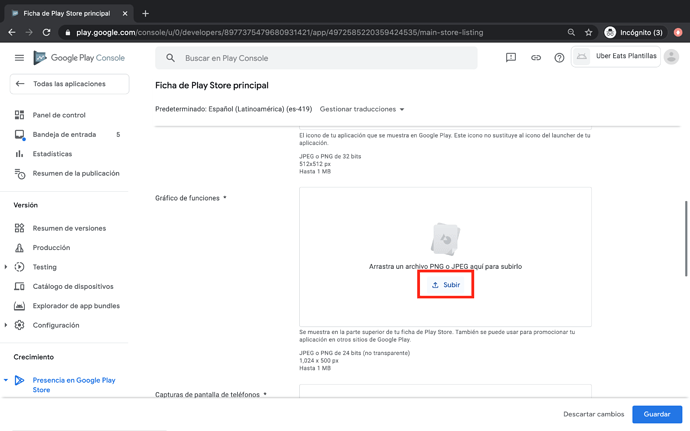
40.- Click on upload and load the Function Graph (promotional banner) in JPEG or PNG file of 1,024 x 500 pixels with a maximum weight of 1MB
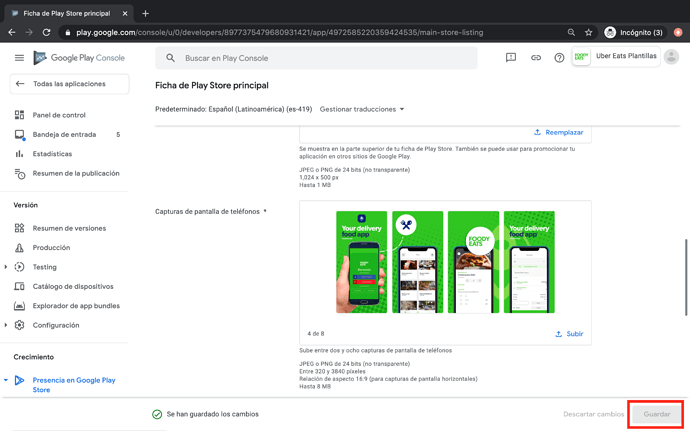
41.- Click on upload and upload 2 to 8 screenshots of your app in a JPEG or PNG file of 320 x 320 pixels minimum and 3840 x 3840 pixels maximum with a maximum size of 8MB each.
42.- Click on Save.
43.- Click on Control Panel.
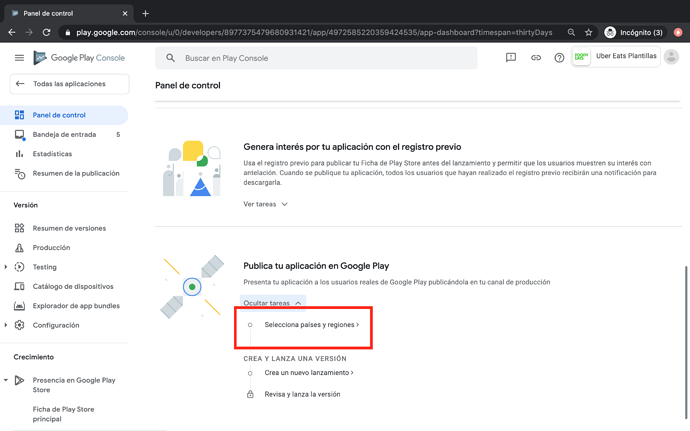
44.- Select to see tasks in the Publish your application on Google play section.
45.- Click on Select countries and regions.
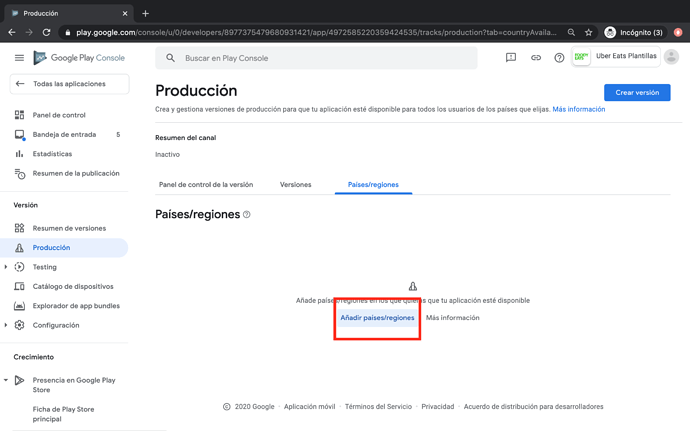
46.- Click on Add countries and regions.
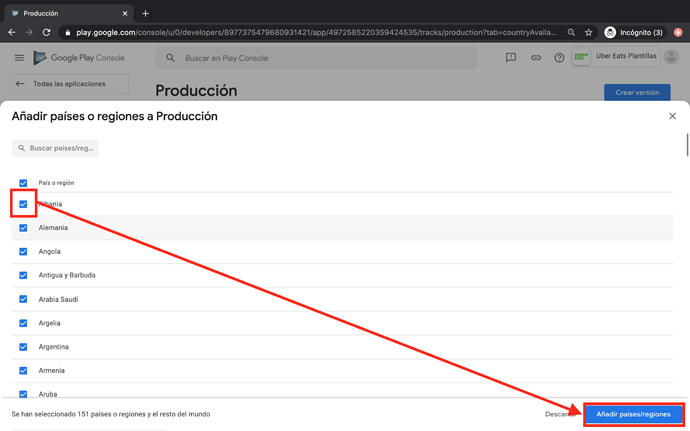
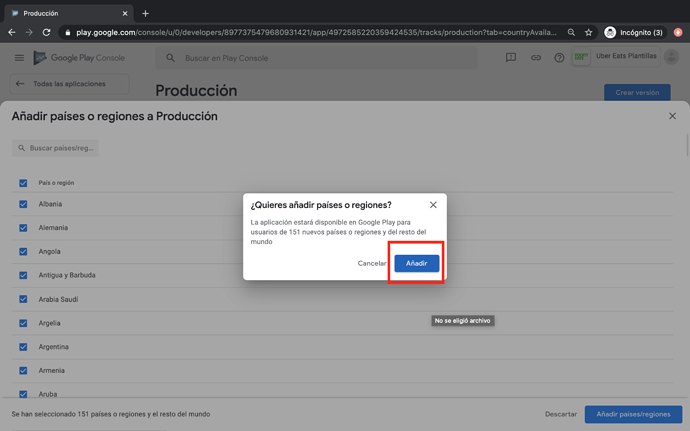
47.- Select by clicking on the boxes the countries where your app will be available for download and click on Add countries and regions.
48.- Click on Add.
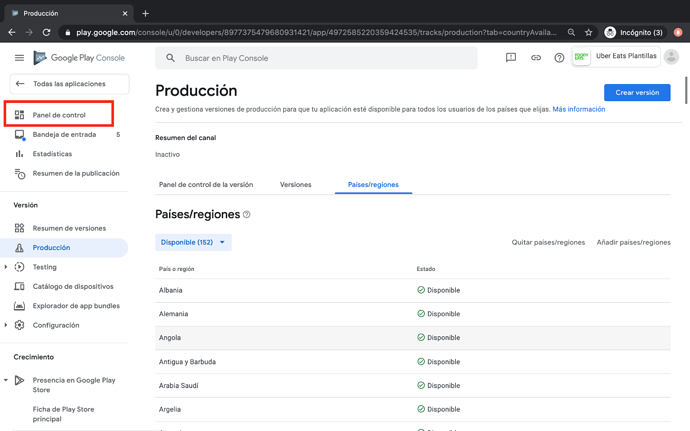
49.- Click on Control Panel
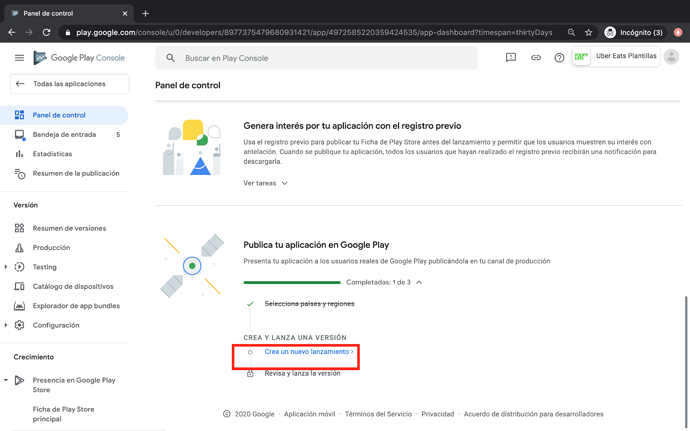
50.- Select the Create a New Launch option in the Publish Your Application on Google Play section.
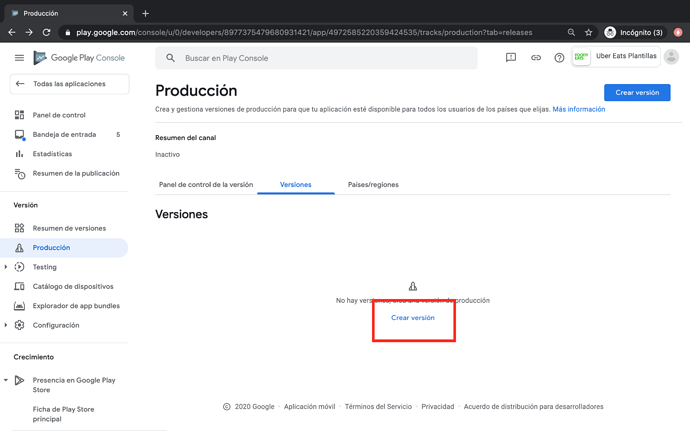
51.- Click on Create Version.
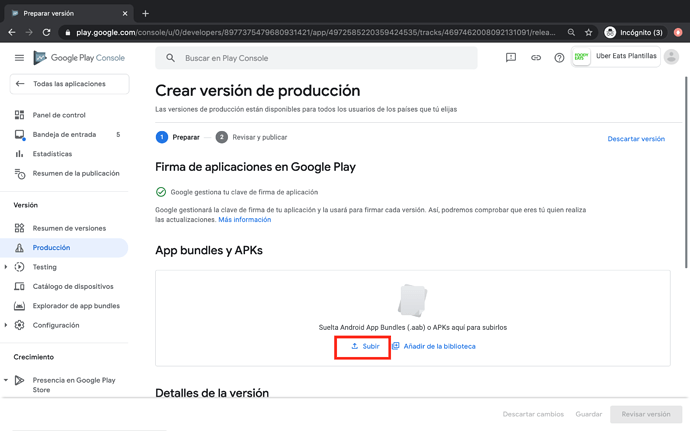
52.- Click on upload in the App bundles and APKs section to load the Apk or Aab file of your app.
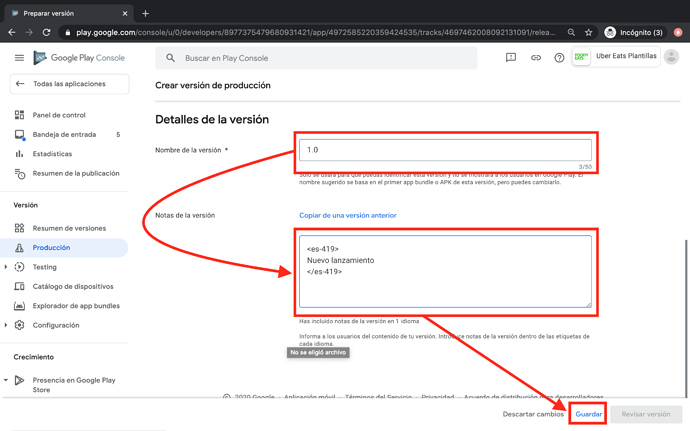
53.- Write the version number in the name of the version, add the text of the new functions that the version includes in Release Notes, and click Save.
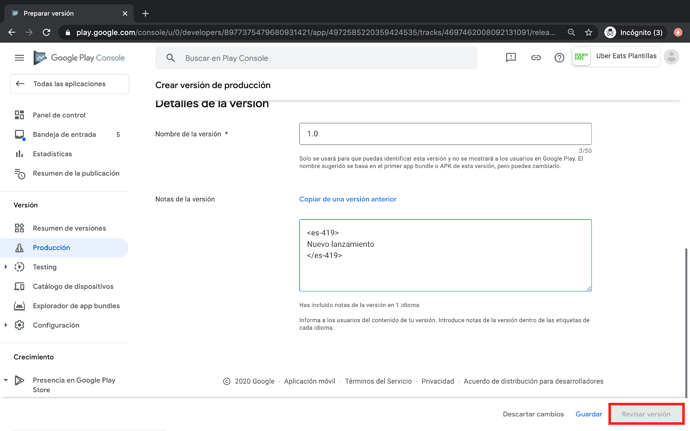
54.- Click on Check Version.
Last updated
Was this helpful?
